


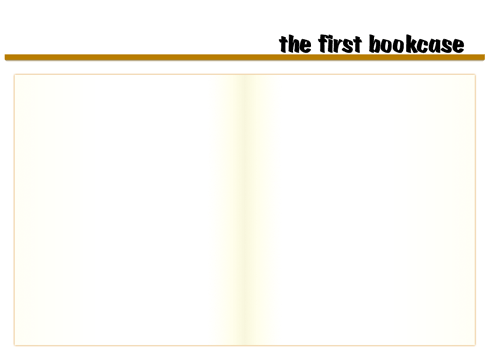
우선 만들고자 하는 형태는 위와 같습니다.
그럼 어떻게 만들어야 할까요? 이렇게 모두 다 자르고 만들기엔 너무 복잡해지겠죠?;;
아랫쪽의 디자인을 가만히 살펴보시면 각 모서리가 라운딩 처리되어있고
가운데에도 배경이 들어가있습니다.
<div class="wrap">
<div class="header">
<div class="top_left"></div>
<div class="top_center"></div>
<div class="top_right"></div>
</div>
<div class="content">
<div class="left_section">1<br />1</div>
<div class="right_section">2</div>
</div>
<div class="footer">
<div class="bottom_left"></div>
<div class="bottom_center"></div>
<div class="bottom_right"></div>
</div>
</div>
우선 전체를 감싼 뒤, 헤더, 컨텐트, 푸터로 나누었습니다.
그리고 헤더와 푸터는 왼쪽, 가운데, 오른쪽으로 나누었고,
컨텐트는 왼쪽섹션과 오른쪽 섹션으로 나누었습니다.
(관리자 권한이다 보니깐 소스가 먹혀버리네요. 위에 소스 칸에 따로 다시 입력해놓았습니다.)
<style>
div {border:0px solid black;}
.wrap {width:790px;height:400px;background: url(bg_section_boundary.png) repeat-y center;}
.header {width:790px;height:5px;overflow:hidden;}
.content {width:790px;height:390px;}
.footer {width:790px;height:5px;overflow:hidden;}
.left_section {float:left;width:50%;height:100%;background: url(bg_vertical.png) repeat-y -5px;}
.right_section {float:right;width:50%;height:100%;background: url(bg_vertical.png) repeat-y right ;background-position:390px;}
.top_left {float:left;width:5px;height:5px;background: url(bg_corner.png);}
.top_center {float:left;width:780px;height:5px; background: url(bg_horizon.png);}
.top_right {float:left;width:5px;height:5px; background: url(bg_corner.png) right top;}
.bottom_left {float:left;width:5px;height:5px;background: url(bg_corner.png) left bottom;}
.bottom_center {float:left;width:780px;height:5px; background: url(bg_horizon.png) bottom;}
.bottom_right {float:left;width:5px;height:5px; background: url(bg_corner.png) right bottom;}
</style>
bg_section_boundary.png 
bg_vertical.png 
bg_horizon.png 
bg_corner.png 
(1px 짜리는 잘 안 보이시겠지만 파일명 옆에 그림 첨부되었습니다.)
이렇게 4개입니다.
섹션 바운더리는 가운데 배경이고, wrap에서 center 옵션을 줘서 나타내었습니다.
bg_vertical과 bg_horizon은 각각 top_center&bottom_center 그리고 left_section&right_section의 배경에서 포지션 옵션을 주었습니다.
또, bg_corner.png 는 배경 포지션을 잡아주고 .top_left, .top_right, .bottom_left, .bottom_right 에서 사용되었습니다.
그림파일과 html파일을 담아두었습니다.
-
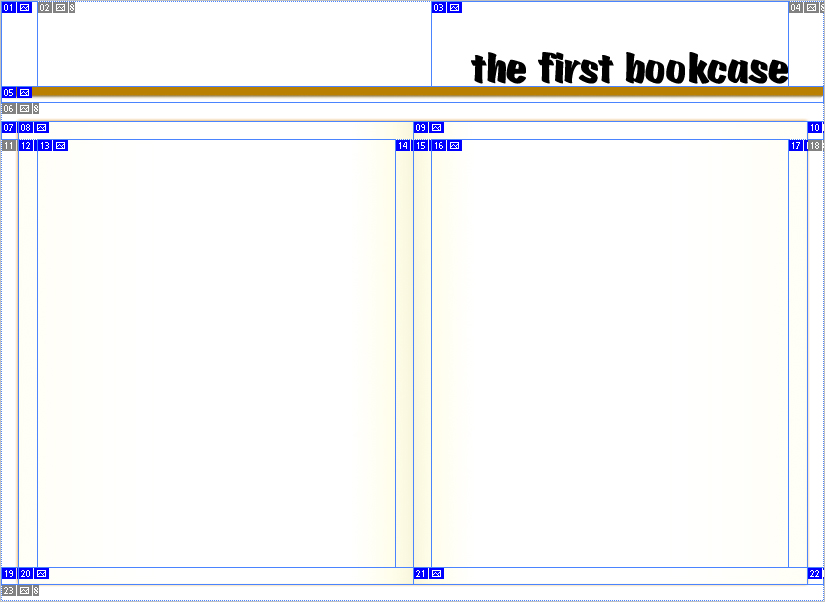
답변 달기<DIV id="corner_spacer_left"></DIV><DIV id="book_location"></DIV><DIV id="the_first_bookcase"><IMG src="/images/logo.png"></DIV><DIV id="corner_spacer_right"></DIV><DIV id="bookshelf"><IMG src="/images/the_first_bookcase_05.png"></DIV><DIV id="top_spacer"></DIV><DIV id="tiny_spacer_leftt"><IMG src="/images/the_first_bookcase_07.png"></DIV><DIV id="left_headnote"></DIV><DIV id="right_headnote"></DIV><DIV id="tiny_spacer_rightt"><IMG src="/images/the_first_bookcase_10.png"></DIV>로고 부분은 wrap에서 따로 빼시고요.<DIV id="wrap"><DIV id="middle"><DIV id="left_spacer">1<IMG src="/images/the_first_bookcase_11.png"></DIV><DIV id="19px_margin_left">2<IMG src="/images/the_first_bookcase_12.png"></DIV><DIV id="left_page">3</DIV><DIV id="18px_margin_left">4<IMG src="/images/the_first_bookcase_14.png"></DIV><DIV id="18px_margin_right">5<IMG src="/images/the_first_bookcase_15.png"></DIV><DIV id="right_page">6</DIV><DIV id="19px_margin_right">7<IMG src="/images/the_first_bookcase_17.png"></DIV><DIV id="right_spacer">8<IMG src="/images/the_first_bookcase_18.png"></DIV></DIV><DIV id="end"><DIV id="tiny_spacer_leftb"><IMG src="/images/the_first_bookcase_19.png"></DIV><DIV id="left_footnote"></DIV><DIV id="right_footnote"></DIV><DIV id="tiny_spacer_rightb"><IMG src="/images/the_first_bookcase_22.png"></DIV><DIV id="bottom_spacer"><IMG src="/images/the_first_bookcase_23.png"></DIV></DIV></DIV>그럼 이렇게 middle과 end로 보이게 되거든요.wrap에 width, height을 넣어주고, middle와 end에서 clear:both 속성을 지워주고,파일명과 class명을 알아보기 편하게 바꿔주시고,예를 들어 the_first_bookcase_22.png로 되어있는데 이게 어느 부분인지 알기 어렵거든요.또, class명도 19px_margin_right라고 하기 보다는 이 위치를 적어줘야 할 것 같아요.
-
답변 달기이대로 하실려면 이것을 map으로 삼고, class명도 위에 나타나있듯이, #11, #12...로 하시는 게 편하실 듯 합니다.괜히 #19px_margin_right 으로 하기 보다 말이죠.
-
corner_spacer_left → 1답변 달기book_location 2the_first_bookcase, 3corner_spacer_right, 4bookshelf, 5top_spacer, 6tiny_spacer_leftt, 7left_headnote, 8right_headnote, 9tiny_spacer_rightt, 10left_spacer, 1119px_margin_left, 12left_page, 1318px_margin_left, 1418px_margin_right, 15right_page, 1619px_margin_right, 17right_spacer, 18tiny_spacer_leftb, 19left_footnote, 20right_footnote, 21tiny_spacer_rightb, 22bottom_spacer, 23#2 { width: 394px; height: 85px; float: left; }#3 { width: 357px; height: 85px; float: left; }#5 { width: 823px; height: 16px; clear: both;}#middle { width: 823px; height: 428px; clear: both; }#end {width: 823px; height: 17px; clear: both; }#1 { width: 36px; height: 85px; float: left; }#4 { width: 36px; height: 85px; float: left; }#6 { width:823px; height: 19px; }#23 { width: 823px; height: 17px; }#11 { width: 17px; height: 428px; float: left;}#18 { width: 17px; height: 428px; }#8 { width: 395px; height: 18px; float: left; background-image: URL('images/the_first_bookcase_08.png'); }#9 { width: 394px; height: 18px; float: left; background-image: URL('images/the_first_bookcase_09.png'); }#20 { width: 395px; height: 17px; float: left; background-image: URL('images/the_first_bookcase_20.png'); }#21 { width: 394px; height: 17px; float: left; background-image: URL('images/the_first_bookcase_21.png'); }#7 { width: 17px; height: 18px; float: left; }#10 { width: 17px; height: 18px; float: left; }#19 { width: 17px; height: 17px; float: left; }#22 { width: 17px; height: 17px; float: left; }#12 { width: 19px; height: 428px; float: left; }#17 { width: 19px; height: 428px; float: left; }#14 { width: 18px; height: 428px; float: left; }#15 { width: 18px; height: 428px; float: left; }#13 { width: 358px; height: 428px; float: left; background-image: URL('images/the_first_bookcase_13.png'); }#16 { width: 357px; height: 428px; float: left; background-image: URL('images/the_first_bookcase_16.png'); }
-
그리고 id는 모두 class로 변경하였습니다. id로 작업해봤는데 스타일이 안 먹히는 것 같더군요. -.-a답변 달기
-
답변 달기<!DOCTYPE html PUBLIC "-//W3C//DTD XHTML 1.0 Transitional//EN" "http://www.w3.org/TR/xhtml1/DTD/xhtml1-transitional.dtd"><!-- saved from url=(0060)http://movengroove.hosting.paran.com/the_first_bookcase.html --><HTML xmlns="http://www.w3.org/1999/xhtml">이거 때문이더군요;