시작하기 전에 아래 링크를 읽고 환경설정과 프로젝트 생성을 완료한다.
https://satisfactoryplace.tistory.com/138?category=872124
[React Native] 설치 및 환경설정
해당 포스트는 https://book.naver.com/bookdb/book_detail.nhn?bid=15767673를 참고하여 작성되었다. 스무디 한 잔 마시며 끝내는 React Native 단순하지만 강력한 앱을 원한다면,앱 개발을 위한 최고의 선택2020..
satisfactoryplace.tistory.com
https://satisfactoryplace.tistory.com/139?category=872124
[React Native] 프로젝트 생성 및 샘플 실행
npm config set save-exact=true 우선 위의 명령어를 이용하여 버전이 꼬이는 현상을 방지해준다. //react-native init [PROJECT-NAME] react-native init MyProject 위의 명령어를 이용해 프로젝트를 만들고 초기..
satisfactoryplace.tistory.com
https://github.com/react-native-webview/react-native-webview
react-native-webview/react-native-webview
React Native Cross-Platform WebView. Contribute to react-native-webview/react-native-webview development by creating an account on GitHub.
github.com
RN에서는 기본 컴포넌트로 웹뷰를 제공하지 않는다.
따라서 webview모듈을 설치할 것이다.
npm install --save react-native-webview
이제 설치한 모듈을 네이티브 컴포넌트와 링킹하기 위해 아래 명령어를 실행한다
react-native link react-native-webview
android를 빌드할 예정이라면 이 과정을 따른다.
android 디렉터리의 gradle.properies로 들어가서 아래 라인을 추가한다.
(이미 존재한다면 이 단계는 건너뛴다)
android.useAndroidX=true
android.enableJetifier=trueIOS도 빌드할 예정이라면, ios디렉터리로 이동한 다음 아래 명령어를 실행한다.
pod install
만약 설치된 cocoapod의 버전이 낮다는 오류 메시지가 나올 경우
sudo gem install cocoapods
pod install
를 실행한다.
component폴더를 생성하고, 그 안에 MyWebView.js 파일을 생성한 후 아래 내용을 붙여넣는다.
import React, {useEffect, useState} from 'react';
import {
  BackHandler,
} from 'react-native';
import {WebView} from 'react-native-webview';

const MyWebView= ({handleClose}) => {
  const BASE_URL = 'YOUR_WEBSITE_URL';
  const [webview, setWebview] = useState();
  const [goBackable, setGoBackable] = useState(false);
  useEffect(() => {
    const backHandler = BackHandler.addEventListener(
      'hardwareBackPress',
      () => {
        console.log('goBackable', goBackable);
        if (goBackable) webview.goBack();
        else handleClose();
        return true;
      },
    );
    return () => backHandler.remove();
  }, [goBackable]);
  useEffect(() => {
    if (webview && webview.clearCache) webview.clearCache();
  }, [webview]);
  return (
    <WebView
        pullToRefreshEnabled={true}
        startInLoadingState={true}
        allowsBackForwardNavigationGestures={true}
        source={{uri: BASE_URL}}
        mixedContentMode={'compatibility'}
        originWhitelist={['https://*', 'http://*']}
        overScrollMode={'never'}
        ref={(ref) => setWebview(ref)}
        injectedJavaScript={`
        (function() {
            function wrap(fn) {
            return function wrapper() {
                var res = fn.apply(this, arguments);
                window.ReactNativeWebView.postMessage(window.location.href);
                return res;
            }
            }
            history.pushState = wrap(history.pushState);
            history.replaceState = wrap(history.replaceState);
            window.addEventListener('popstate', function() {
            window.ReactNativeWebView.postMessage(window.location.href);
            });
        })();
        true;
        `}
        onMessage={(event) => {
        const url = event.nativeEvent.data;
        setGoBackable(url !== BASE_URL);
        console.log('onMessage', event.nativeEvent.data);
        }}
    />
  );
};

export default MyWebView;
const BASE_URL= "YOUR_WEBSITE_URL" 부분을 원하는 주소로 변경한다.
https://test.com 이라면 const BASE_URL= "https://test.com"으로 변경한다.
App.js는 다음과 같이 변경한다.
/**
 * Sample React Native App
 * https://github.com/facebook/react-native
 *
 * @format
 * @flow strict-local
 */

import React from 'react';
import {
  SafeAreaView,
  StatusBar,
  StyleSheet,
  useColorScheme,
  Alert,
  BackHandler
} from 'react-native';
import MyWebView from './components/MyWebView';


const App = () => {
  const isDarkMode = useColorScheme() === 'dark';

  return (
    <>
      <StatusBar barStyle={isDarkMode ? 'light-content' : 'dark-content'} />
      <SafeAreaView style={styles.root}>
        <MyWebView
          handleClose={()=>{
            Alert.alert('앱 종료', '앱을 종료하시겠습니까?', [
              {
                text: '아니오',
                onPress: () => null,
              },
              {text: '예', onPress: () => BackHandler.exitApp()},
            ]);
          }}/>
      </SafeAreaView>
    </>
  );
};

const styles = StyleSheet.create({
  root: {
    flex: 1
  },
});

export default App;
내부 화면 작성은 끝났다!
아이콘 리소스 파일이 준비되었다면
https://satisfactoryplace.tistory.com/143?category=872124
[React Native] IOS/Android 앱 아이콘 리소스 한번에 제작
앱 아이콘은 만들었다고 해서 끝난 것이 아니다. 각 디바이스마다 적절한 크기가 있어서 해당 크기로 하나씩 변환해주어야 하는데, 상당히 귀찮은 작업이다. https://appicon.co/ App Icon Generator Generate
satisfactoryplace.tistory.com
를 참고하여 각 디바이스별 리소스를 생성한다.
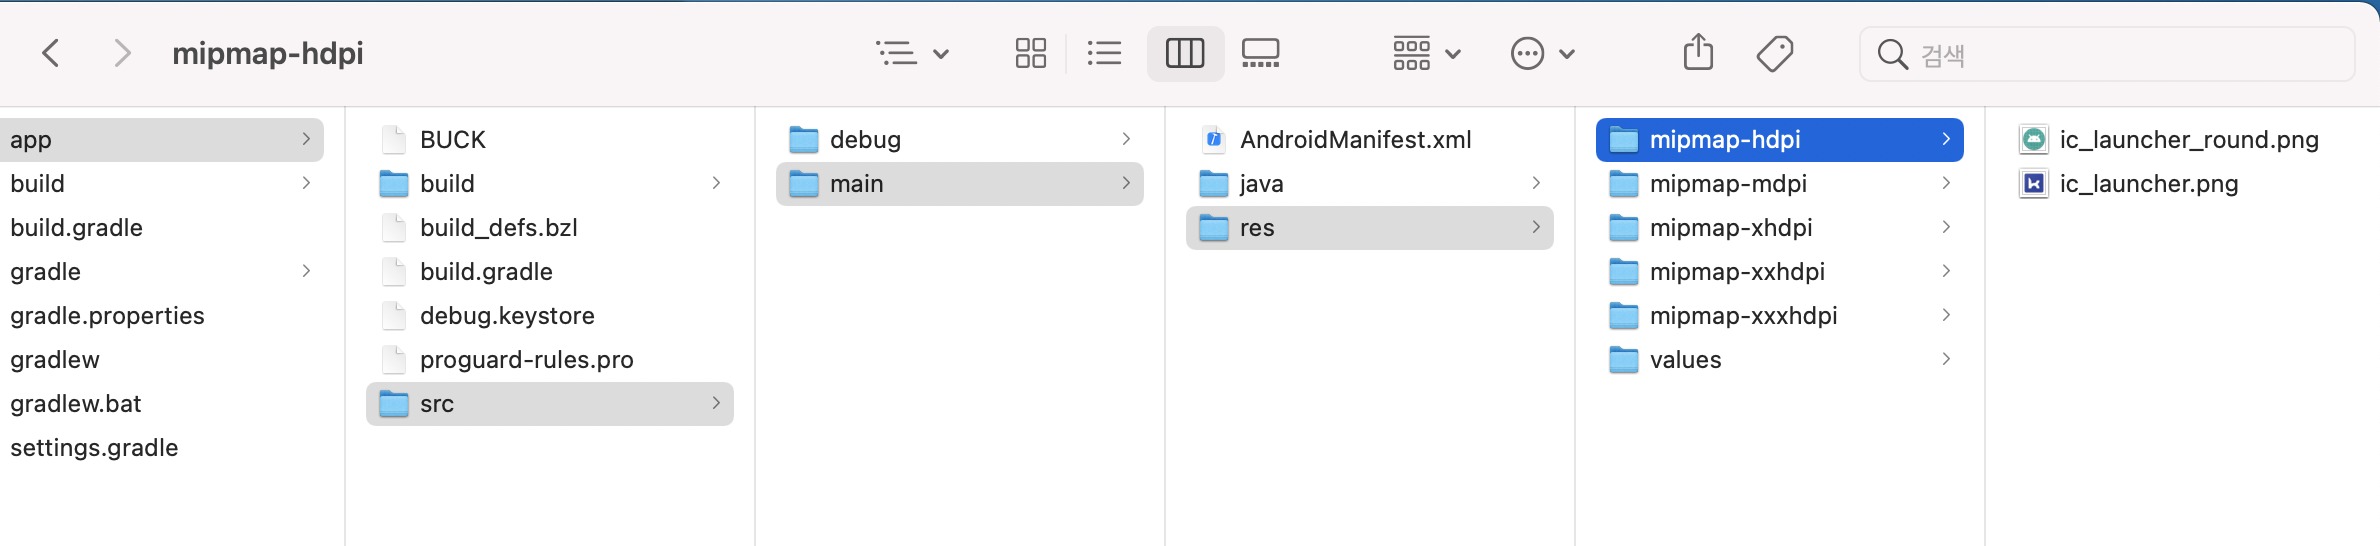
결과물은 위와 같다.
android의 경우 /android/app/src/main/res 에 존재하는 각 폴더에 위 내용물들을 넣는다.
ios의 경우 /ios/[PROJECT_NAME]/Images.xassets/AppIcon.appiconset/에 Assets.xassets폴더 내용물들을 붙여넣기한다.
이제 yarn android 또는 yarn ios로 실행시켜서 정상적으로 적용되는지 검사한다

잘 된다.
기본적으로는 앱 이름이 프로젝트 이름과 동일하다.
앱 이름을 변경해 보자.
android의 경우 /android/app/src/main/res/values/strings.xml로 들어가서
<resources>
    <string name="app_name">원하는 앱 이름</string>
</resources>
처럼 변경한다.
ios의 경우 /ios/[PROJECT_NAME]/info.plist 를 편집기로 열어서
<key>CFBundleDisplayName</key>
<string>원하는 앱 이름</string>
CFBundleDisplayName을 찾아 <string>~</string>에 원하는 이름을 입력한다.
마찬가지로 yarn android 또는 yarn ios로 실행시켜서 정상적으로 적용되는지 검사한다
정상적으로 적용되었다.